This article discusses how to build a continuous deployment pipeline for an AWS ECS application using Travis CI.
Problem
Deploying a docker-base application to the AWS ECS is a tedious task. It requires to push the image to an image repository, create a new task definition with that image, and update the service with the new definition. It is quick but repetitive.
In large organizations that have rapid deployment cycles, such tasks are usually taken care by CI/CD pipelines, like Jenkins. But for a personal side projecthttps://jenkins.io/index.html, a dedicated CI/CD system is not affordable and it is an overkill lto use
Travis CI is a continuous deployment service that provides free integration and service with public GitHub repositories. If you develop an open-source project at GitHub and add a .travis.yml file, Travis CI can connect with the repository and react to any code change.
This article assumes you have basic knowledge on AWS ECS and Travis CI.
Script Deployment in Travis CI
The requirement of the continuous deployment to AWS ECS is simple. Every time a pull request to the master branch is merged, the Travis CI should be noticed and perform the continuous deployment.
The deployment to AWS ECS requires custom operations and it is not automated by the Travis CI yet. To support sophisticated deployment operations, the Travis CI provides Script Deployment and it allows the developer to execute a specified script for deployment.
It can be activated by adding a new deploy section in the .travis.yml file in the project repository.
1 | # deployment section in the .travis.yml |
Deployment Script
The next step is to define tasks for the deployment. We would like to define more repetitive tasks for the Travis CI and leave the most important action to the developer, like clicking the Merge button at the GitHub PR.
Specifically, these steps are required:
- build the docker image from the source code
- tag the docker image as
latest - push the docker image to an image repository
- update the AWS ECS application with the new image
The first three steps could be done with the docker CLI. The fourth step actually includes many interactions with AWS, but a very nice library called ecs-deploy could do all things with one line of command!
1 | # install AWS SDK |
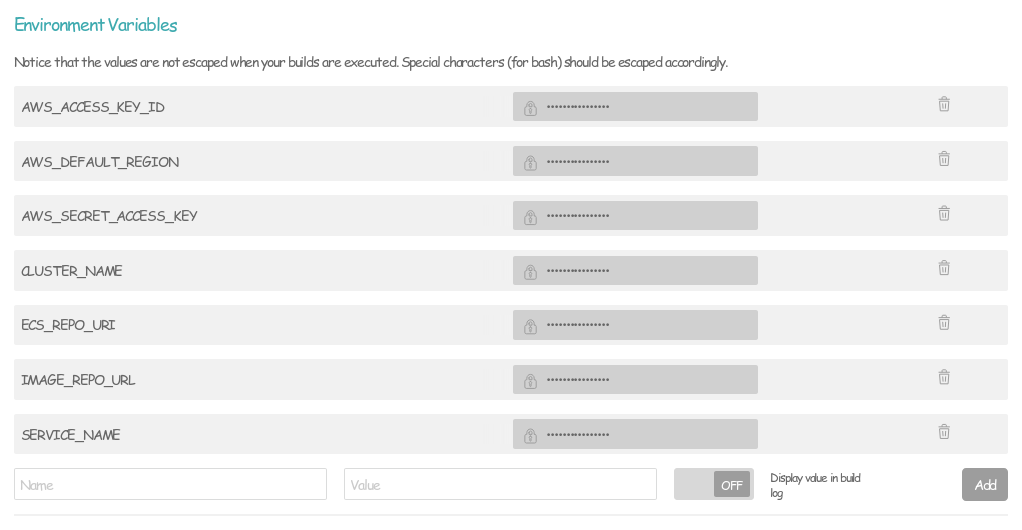
All $VARIABLE_NAME in the deployment script refer to an environment variable. Except PATH and HOME, which are provided by the operation system, you should provide the rest of them:
IMAGE_REPO_URLis the url of a docker image repository. It could be DockerHub repository name or AWS ECR repository url, or any other.CLUSTER_NAMEis the name of the running ECS cluster.SERVICE_NAMEis the name of the running ECS service.
These values could be hard-coded, but using an environment variable makes the script more secure and portable.
Note that ecs-deploy deploys to an existing ECS service. If the specified service is not created, it will not try to new one and throw an error instead.
Continuous Deployment
With the deployment script discussed above, we can write the Travis CI configuration .travis.yml.
1 | # I am using a nodejs for my demo application |
The configuration is pretty much the same as the one from the documentation. It requires the docker service for the docker command line tool.
Then you should add required environment variables in the Settings page of the Travis repository. Additionally, AWS_ACCESS_KEY_ID, AWS_SECRET_ACCESS_KEY, and AWS_DEFAULT_REGION are needed to help accessing AWS.

Final
Wow, you are done here 🎉 With this setting, you will have a continuous deployment pipeline that reacts to any PR merged into the master branch. And it deploys :-)

Thank you for reading this blog post. All code in this post could be found in this GitHub repository (⭐ it if it helps) and it is working.