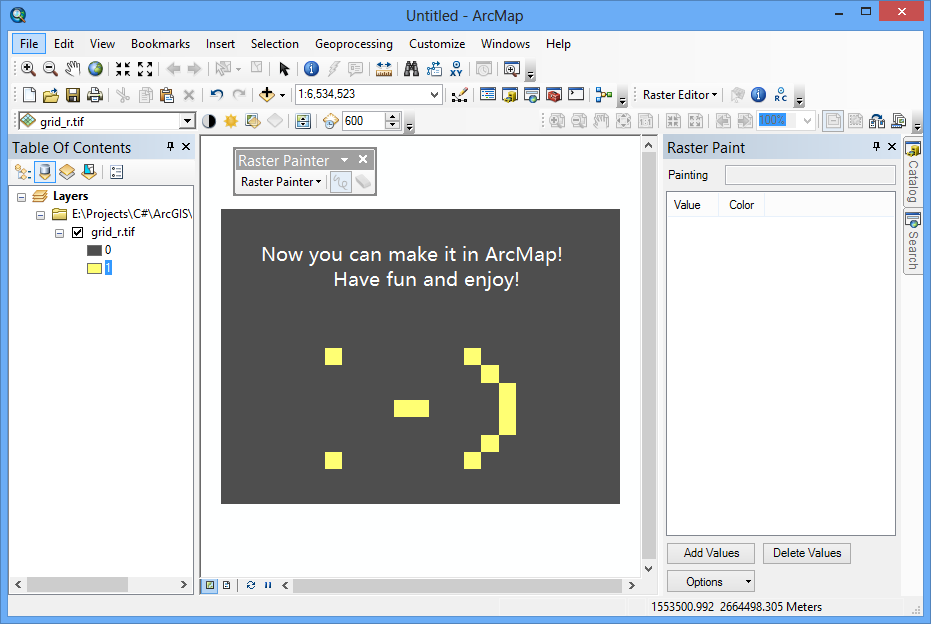
I am glad to announce that the project ArcMap Raster Edit Suite (ARES) has proceed to its second major version 0.2.0! A completely new toolbar Raster Painter is added into the add-in. Many people have realized that editing pixels using tools in Raster Editor may be labor intensive, especially when editing large number of pixels. This toolbar is here to provide an ultimately flexible solution to edit pixels, by painting new values on it. The editing style is design to be similar to draw image and picture. You can find similar toolbars in ArcMap like ArcScan and Raster Painting, but they are not designed for raster data modification. Of course, a very close analogy is Paint on Window.
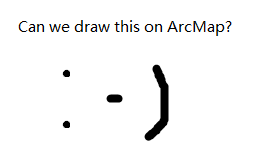
Raster Painter Toolbar
The ARES installation package could be downloaded at the GitHub project page.
After installing the ARES Add-In, a new toolbar Raster Painter will be added into ArcMap.

In the initial release, the tool includes two basic tools:
 **Freehand Paint** - provide a freehand painting on the raster layer
 **Erase** - Erase unsaved painted pixels from cache
This toolbar aims at maximizing the flexibility, not the accuracy (e.g. editing pixels at specific rows and columns). If the accuracy is your need, please have a look at another toolbar Raster Editor.
Painting on the layer
Painting on a raster layer in ArcMap is just like painting a picture with Paint or PhotoShop. The major difference is just you are painting values, instead of colors, on the raster layer. You can do it just with a few steps.
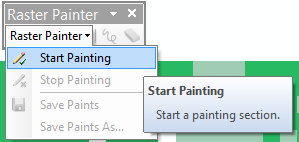
- Start Painting Section. You can only paint on a raster layer for one time. If you have several layers in ArcMap, you will select one for painting in the selection window.
- Add Values for Painting. Click the Add Values button on the Raster Paint window, in order to add values that you want to paint on the layer.
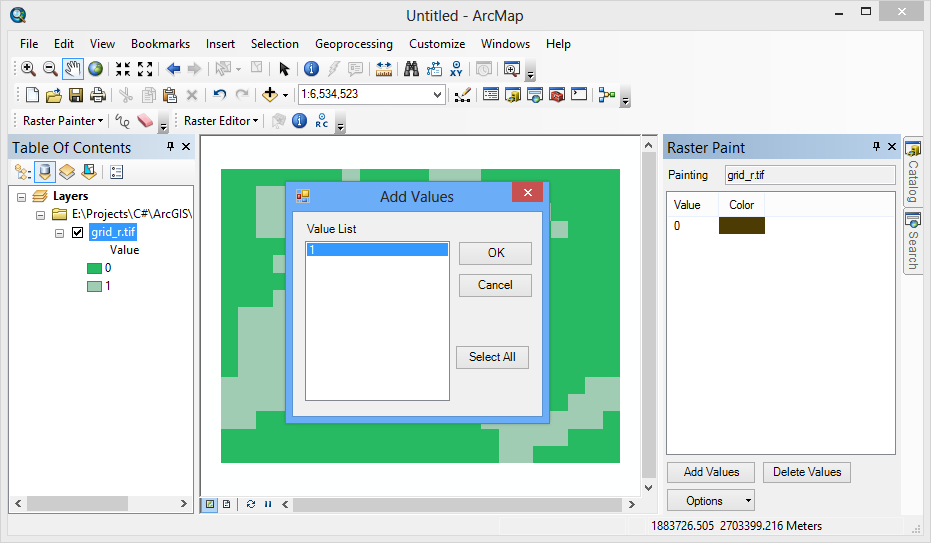
A random color will be assigned to each added value. You can change the color by right clicking the color column on the value list.
If you want to delete values from the list, just click the Delete Values button.
If you want to add new values that does not exist on the layer, click Add New Values… button on the Options Menus. However, you are not able to add any value violating the pixel type of the layer (e.g. 257 for a 8-bit unsigned integer layer).
- Painting Values. After selecting a value on the Raster Paint window, you can paint the value on the layer using the Freehand Paint tool.
While painting, please keep you mouse move smoothly and steadily.
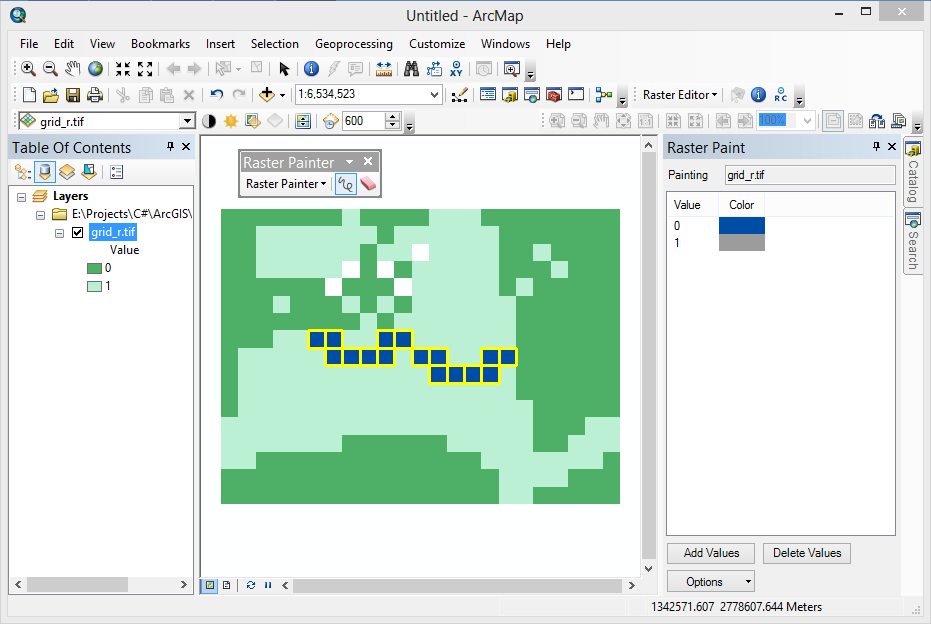
Painted values are symbolized with yellow frame so that you are not going to miss them.
- Erase Painted Values. If you want to remove values you paint, just use the Erase tool to remove them.
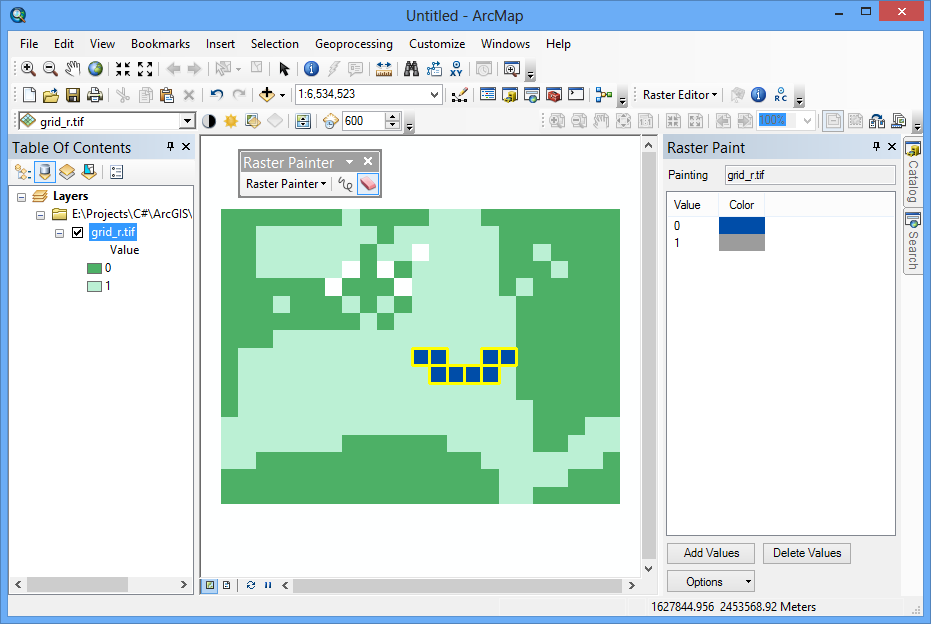
Noted that the Erase tool can only remove painted values on the layer. If you want to erase existing values on the layer, you could simply paint the NoData value on pixels.
- Save Painted Values. You can save painted values to the original file using the Save Paints button, or to a new file using the Save Paints As button.

- Stop Painting Section
Now you have your raster layer edited. Isn’t it simple and quick :)
What is next?
The initial release only provides the most basic functionality. More advanced and handy tools are under development:
Draw polyline/polygon/Circle/Rectangle
Draw in selection region
Fill polygon
Painting history (e.g. undo and redo)
I hope I can finish these updates soon. If you have any idea about the new functionality, don’t hesitate to give me a comment :)
Special Thanks
I would like to thank Xuan Wang, Hancheng Nie and Jiang Qing for contributing their codes to this project. And I would like to thank all people who support and encourage me to continue this project.
